2026 Top Guide Best Tire Pressure for Off Road MTB?

Time:2026-10-07 Author:Ethan
0%

Choosing the right pressure can transform an off-road mountain bike ride. It affects grip, steering control, rolling speed, and rim protection.

What is the best tire pressure for off-road mountain biking? There is no universal number. A 60-kilogram rider on a 2.4-inch tubeless tire needs a different setup from a 95-kilogram rider using narrow tires. Trail surface matters too. Wet roots, loose gravel, sharp rocks, and smooth hardpack each demand different support.

This guide uses practical workshop experience, tire manufacturer guidance, and real trail testing. As a useful starting point, many riders test around 20–28 psi in the front tire and 22–30 psi in the rear. These figures are only starting points. Lower pressure may improve traction, but excessive softness can cause rim strikes, tire burping, or vague cornering. Higher pressure can feel fast on firm ground, yet it may bounce across rocks like a basketball.

Small changes matter. Adjust by 1–2 psi, then ride the same section again. Check pressure with a reliable gauge before the tires warm up. Look for sidewall folds, rim marks, or repeated impacts. I have sometimes trusted a familiar pressure for too long, even when terrain or tire casing changed. That was a mistake. Rider feedback matters more than a fixed chart. The best setup balances comfort, control, speed, and protection for your specific bike, body weight, tires, and trails.
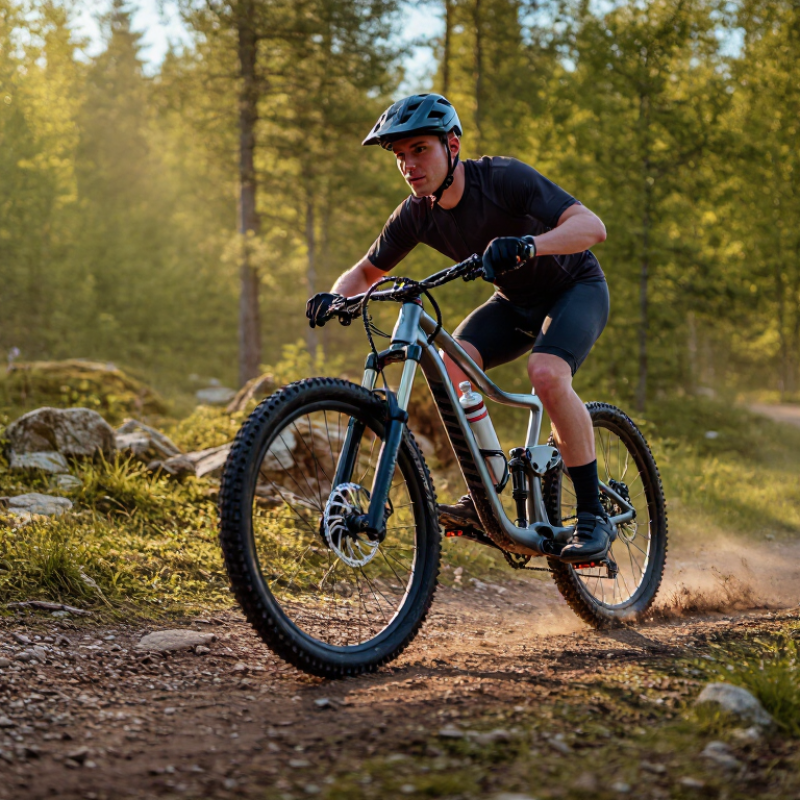
2026 Top Guide Best Tire Pressure for Off Road MTB?

What Tire Pressure Means for Off-Road Mountain Bike Performance

Tire pressure is one of the strongest controls over off-road mountain bike performance. It changes grip, comfort, steering, and the risk of rim damage. Lower pressure lets the tire wrap around roots and loose stones. This creates a larger contact patch and more predictable traction on steep climbs.

I usually check pressure before every ride, when the tires are cold. Rider weight, tire width, wheel size, casing strength, and terrain all matter. A lighter rider may begin near 20–24 psi in the front and 22–26 psi in the rear. Heavier riders may need several more psi. Start conservatively. Then adjust by 1–2 psi after a short test section. The correct setting should feel controlled, not vague.

Too much pressure makes the bike skip across wet roots and sharp rocks. Too little pressure can cause rim strikes, unstable cornering, or tire damage. I once lowered pressure for a rocky descent and gained impressive grip, but the rear wheel felt soft through fast turns. That result showed me that comfort alone is not proof of a good setup. A pressure gauge is useful, but trail feedback matters too. Check for rim impacts, sidewall folding, and unusual tread squirm. Weather changes the reading slightly, and a warm tire may show higher pressure than it had at the trailhead. Some riders chase numbers too closely. I still do sometimes. Real terrain rarely behaves perfectly.

Best Starting Tire Pressure for Off-Road MTB Performance

Suggested tubeless tire pressures for a 2.3–2.5 inch mountain-bike tire on mixed off-road terrain. Rear tires typically use slightly higher pressure because they carry more rider weight.

These values are practical starting points, not fixed rules. Reduce pressure slightly for loose terrain and additional grip, or increase it when rim strikes, tire squirm, or hard impacts occur. Rider weight includes clothing and equipment.

How Rider Weight, Tire Size, and Terrain Affect Pressure Choices

2026 Top Guide: Best Tire Pressure for Off-Road MTB

How Rider Weight, Tire Size, and Terrain Affect Pressure Choices

Choosing off-road MTB tire pressure is less about finding one perfect number. It is about making controlled adjustments. Rider weight changes support, braking feel, and rim protection. A 60-kilogram rider might begin around 21 psi front and 24 psi rear. A 90-kilogram rider may need several psi more. Extra tools or water also increase rear-wheel load. Measure pressure with the same gauge before each ride. Small differences matter.

Tire size changes the safe starting point. A wider tire usually supports lower pressure than a narrow tire. For example, a 2.4-inch tire may feel stable near 20–23 psi for a lighter rider. A 2.2-inch tire may require more air. Casing strength, rim width, and tubeless setup also influence performance. Lower pressure improves grip, but excessive softness can cause rim strikes and vague cornering. I have chased traction too aggressively before. The steering felt slow and unpredictable.

Terrain demands frequent experimentation. Hardpack usually rewards slightly higher pressure and sharper acceleration. Roots and rocks may need lower pressure for comfort and control. Add 1–2 psi after a hard rim impact. Reduce about 1 psi when the bike chatters across repeated roots. Mud can require careful balance. Too much pressure reduces grip, while too little makes the tire fold during turns. Test on one familiar loop, record each change, and judge traction, stability, and impact marks together.

How to Set Your Starting Tire Pressure Step by Step

2026 Top Guide: Best Tire Pressure for Off-Road MTB?

How to Set Your Starting Tire Pressure Step by Step

Check the tire sidewall and rim instructions before riding. ISO 5775 guidance emphasizes correct tire and rim compatibility. ETRTO technical recommendations also require respecting marked pressure limits. These limits matter more than internet formulas.

Add your riding gear and water to your body weight. For a 75–85 kg total load, begin around 21 psi front and 24 psi rear. This suits many 29-inch tires near 2.4 inches wide. Use a reliable gauge, then record the numbers. Measure indoors, because pressure changes with temperature. A 10°F rise can increase pressure by roughly 1 psi.

Ride the same 500-meter trail section. Include one climb, loose corners, and a rocky descent. If the rear tire feels harsh, reduce it by 1 psi. If the rim taps rocks, add 2 psi. Keep the front slightly lower for grip, but avoid vague steering. My first setting is rarely perfect. I sometimes start too high. That mistake costs comfort, yet it protects the rim during testing. Repeat the run after every adjustment. Check for sidewall folding, tire burping, or fresh rim marks. Never go below the tire or rim manufacturer’s stated minimum.

How to Adjust Pressure for Rocks, Mud, Sand, and Trail Conditions

Choosing the best off-road MTB tire pressure starts with terrain, rider weight, and casing strength. For a 70 kg rider and 12 kg bike, begin near 21 psi front and 24 psi rear. Independent bicycle rolling-resistance tests reported pressure changes of 5–15% in measured resistance across different surfaces (Bicycle Rolling Resistance Test Database, 2024). Rocks need controlled flex, but excessive softness can cause rim impacts. Add 1–2 psi if you hear sharp rim strikes. On loose sand, 16–20 psi may create a wider footprint and better flotation. Mud often rewards moderate pressure, around 20–23 psi, because excessive softness can make steering vague. Hard, dry trails usually need 2–4 psi more.

Tips: Check pressure before every ride with the same gauge. Ride one short loop, then inspect sidewall marks and rim contact. ETRTO Standards Manual 2024 advises staying within the tire’s marked pressure range and checking tire-rim compatibility. Do not copy another rider’s settings blindly. Their wheels, casing, and body weight may differ greatly.

I once lowered pressure for rocks and gained grip, but cornering became unstable. That mistake taught me to change one variable at a time. For rocky trails, reduce pressure in 1 psi steps. For sand, test traction while seated and keep momentum steady. In mud, avoid sudden braking and watch for sidewall folding. A few drops of pressure can help. Too many can ruin control. Temperature, altitude, and loaded packs also change real-world pressure, so record what worked rather than trusting a universal chart.

2026 Top Guide: Best Tire Pressure for Off-Road MTB — Adjusting Pressure for Rocks, Mud, Sand, and Trail Conditions
Trail Condition Recommended Pressure Adjustment Front Tire Starting Point Rear Tire Starting Point Why It Works Main Caution
General dry trail Use a balanced baseline suited to rider weight, tire width, and wheel size. 21–25 psi
(1.45–1.72 bar)
23–28 psi
(1.59–1.93 bar)
Provides a practical balance of grip, rolling efficiency, steering control, and rim protection. Begin near the middle of the range and make changes in small 1–2 psi steps.
Rocky and technical terrain Reduce pressure slightly for traction, but retain enough support to prevent harsh rim impacts. 20–24 psi
(1.38–1.65 bar)
22–27 psi
(1.52–1.86 bar)
Lower pressure helps the tire conform to uneven rock surfaces and improves braking and climbing grip. If you hear rim strikes, feel the tire fold, or notice sidewall damage, increase pressure by 1–3 psi.
Loose-over-hard or dusty trail Lower pressure modestly to increase the contact patch and reduce sliding over hard ground. 20–23 psi
(1.38–1.59 bar)
22–26 psi
(1.52–1.79 bar)
Additional tire deformation improves surface grip without making steering excessively vague. Too little pressure can cause squirm during fast cornering and increase puncture risk.
Wet roots and wet rocks Reduce pressure by approximately 1–2 psi from the dry-trail setting. 20–23 psi
(1.38–1.59 bar)
22–26 psi
(1.52–1.79 bar)
A slightly larger contact patch can improve traction on smooth, slippery surfaces. Pressure alone cannot replace smooth steering, controlled braking, and a balanced riding position.
Mud and soft wet soil Use a small pressure reduction only when extra conformity is needed; avoid excessive softness. 21–24 psi
(1.45–1.65 bar)
23–27 psi
(1.59–1.86 bar)
Moderate pressure preserves casing support while allowing the tread to maintain contact with irregular ground. Very low pressure can allow mud to pack around the tire and may reduce directional stability.
Deep sand Lower pressure substantially to increase flotation, provided the tire and rim system can safely support it. 15–19 psi
(1.03–1.31 bar)
16–21 psi
(1.10–1.45 bar)
A larger footprint helps the tire stay on top of loose sand instead of digging into it. Use smooth inputs and avoid hard cornering; extremely low pressure can cause tire unseating or rim damage.
Hard-packed, smooth trail Increase pressure slightly if the surface is smooth and rolling speed is the priority. 22–26 psi
(1.52–1.79 bar)
24–29 psi
(1.65–2.00 bar)
Higher pressure reduces rolling resistance and gives more precise steering on predictable surfaces. Do not raise pressure so far that braking traction decreases or the ride becomes harsh.
Fast trail with repeated impacts Increase pressure by approximately 1–3 psi from the normal dry-trail setting. 23–27 psi
(1.59–1.86 bar)
25–30 psi
(1.72–2.07 bar)
Additional air support reduces tire collapse, rim impacts, and instability at speed. Check that the added pressure does not reduce grip on braking zones or off-camber turns.
Long downhill or bike-park-style descent Prioritize casing support and rim protection over minimum rolling resistance. 24–29 psi
(1.65–2.00 bar)
26–32 psi
(1.79–2.21 bar)
Higher rear pressure helps manage repeated compressions, hard landings, and braking forces. Stay within the tire, rim, and insert manufacturer limits where applicable.
Cold weather or high-altitude riding Measure pressure at the riding location and recheck after the bike reaches outdoor temperature. Use the selected terrain range Use the selected terrain range Air pressure changes with temperature, so a reading taken indoors may not represent trail conditions. Do not compensate for temperature with a large pressure change; adjust gradually after checking handling.
Rider Weight and Equipment Adjustment
Rider system weight: up to 65 kg / 143 lb Use the lower half of the selected terrain range. Subtract 1–3 psi Subtract 1–3 psi Lower total load generally needs less air support to achieve similar tire deformation and grip. Do not go below the tire and rim system’s approved minimum pressure.
Rider system weight: 66–85 kg / 146–187 lb Use the middle of the selected terrain range as a starting point. Baseline range Baseline range This is a common starting zone for many off-road riders using modern tubeless mountain-bike tires. Personal handling preference, tire construction, and riding style still require fine-tuning.
Rider system weight: 86–105 kg / 190–231 lb Use the upper half of the selected terrain range. Add 1–3 psi Add 2–4 psi Extra support helps control casing flex and protects against rim impacts under higher loads. Rear pressure usually needs the larger increase because the rear wheel carries more load.
Rider system weight: over 105 kg / 231 lb Start near or slightly above the upper end of the applicable range. Add 3–5 psi Add 4–6 psi Higher pressure can improve stability, tire retention, and rim protection for heavier systems. Confirm the tire and rim pressure limits before riding and consider professional setup advice.
Quick Setup Rules
Front-to-rear pressure difference Keep the rear tire approximately 2–4 psi higher than the front in most setups. Lower starting pressure Higher starting pressure The rear wheel commonly carries more rider weight and experiences more compressive force. Some suspension layouts, tire casings, and riding styles may require a smaller difference.
Tubeless setup Use the lower end of a safe pressure range only when the tire is securely seated and supported. Terrain-dependent Terrain-dependent Tubeless systems can reduce pinch-flat risk and allow lower pressures than standard inner-tube setups. Low pressure can still cause burping, rim strikes, tire damage, or loss of control.
Inner-tube setup Use approximately 2–5 psi more than a comparable tubeless setup. Add 2–5 psi Add 2–5 psi Extra pressure helps reduce pinch flats when the tube is compressed against the rim. Check for adequate tube size, correct tire seating, and signs of repeated bottoming-out.
These values are practical starting points for off-road mountain biking, not universal limits. Actual pressure depends on tire width, casing stiffness, wheel diameter, rim width, tubeless or inner-tube setup, rider system weight, speed, and riding style. Always stay within the lowest and highest pressure limits printed or specified for the tire and rim. Use a reliable pressure gauge, change only 1–2 psi at a time, and inspect the tire and rim after testing.

How to Test, Fine-Tune, and Maintain the Best Pressure on Every Ride

The best off-road MTB pressure is tested, not guessed. Tire pressure charts are only starting points. ISO 5775-2 recognizes rider load, tire construction, and rim size as pressure variables. Measure both tires with the same gauge before every ride. Record rider weight, tire volume, trail surface, and weather in a small notebook.

On rocky trails, begin around 22 psi front and 24 psi rear for a 75-kilogram rider. These are working examples, not universal rules. Ride one familiar loop at steady speed. If the front tire wanders in corners, add 1 psi. If the rear feels harsh, reduce 1 psi. Make only one change at a time. A 2023 review in Sports Engineering linked lower pressure with improved surface grip, but it also warned about greater rim-impact risk. Traction is not free.

Check for rim strikes, sidewall folding, and vague steering after each run. A digital gauge helps, though inexpensive gauges can differ by 2–3 psi. I have trusted a faulty gauge before. It cost me confidence, not just time. The Bicycle Rolling Resistance laboratory method also shows why casing design changes results; equal pressure does not create equal tire behavior. Recheck pressure after temperature changes, transport, or sealant service. Keep a pressure floor based on your rim and tire maker’s limits, then increase pressure for long descents, heavy packs, or sharp rocks. Five quiet minutes before riding can prevent a loud mistake.

FAQS

How does rider weight affect off-road MTB tire pressure?

Heavier riders usually need several psi more for support and rim protection. A 60-kilogram rider might begin near 21 psi front and 24 psi rear. A 90-kilogram rider may need more. Tools and water add rear-wheel load.

What starting pressure suits a typical rider?

A 70-kilogram rider with a 12-kilogram bike might start near 21 psi front and 24 psi rear. Treat these figures as working examples. Your tires, rims, and casing may behave differently.

How does tire width change pressure choices?

Wider tires usually support lower pressure than narrower tires. A 2.4-inch tire may feel stable near 20–23 psi for a lighter rider. A 2.2-inch tire may need more air. Rim width and casing strength also matter.

What pressure works on rocky trails?

Begin conservatively, then reduce pressure in 1 psi steps. Lower pressure can improve grip over roots and rocks. Add 1–2 psi after sharp rim strikes. Do not ignore repeated impacts.

How should pressure change on hardpack, mud, or sand?

Hard, dry trails often need 2–4 psi more for sharper acceleration. Mud may suit moderate pressure around 20–23 psi. Loose sand can work near 16–20 psi for a wider footprint. Too little air can fold the sidewall.

How can I test pressure without guessing?

Use one familiar loop and change only one variable. Ride steadily, then inspect traction, steering, sidewall marks, and rim contact. Record pressure in a small notebook. Five quiet minutes helps.

What symptoms show that tire pressure is too low?

Rim strikes, vague steering, slow cornering, and sidewall folding are warning signs. I once chased traction too aggressively. The bike felt unpredictable. Reduce pressure more carefully next time.

Why should I use the same pressure gauge?

Different gauges can disagree by 2–3 psi. Measure both tires before every ride with the same gauge. Recheck after transport, temperature changes, or sealant service. Small differences matter.

Conclusion

Choosing the right tire pressure is one of the most important ways to improve off-road mountain bike control, comfort, traction, and puncture protection. What is the best tire pressure for off-road mountain biking depends on several factors, including rider weight, tire width, wheel size, rim protection, riding style, and terrain. A heavier rider or rocky trail may require slightly more pressure, while a lighter rider or softer surface may benefit from lower pressure for improved grip.

Begin with a moderate pressure based on your tire setup, then make small adjustments before and during each ride. Lower pressure can help tires conform to rocks and roots, while higher pressure may improve stability in fast sections and reduce rim impacts. Mud often requires balanced pressure for control, whereas sand may benefit from a softer setup. Test your settings on familiar trails, watch for excessive bouncing, slipping, tire squirm, or impact strikes, and adjust gradually. Regularly check pressure with a reliable gauge and maintain consistent settings for changing conditions.

Ethan

Ethan

Ethan is a seasoned marketing professional with a deep expertise in our company's innovative product line. With a passion for sharing knowledge and insights, he takes the lead in regularly updating our corporate blog, where he explores industry trends, product features, and effective marketing......