2026 How to Fix an E Bike Motor That Cuts Out?

Time:2026-10-17 Author:Madeline
0%

Why does my e-bike motor cut out unexpectedly? This question often appears after a rider feels a sudden loss of assistance near a hill, traffic light, or rough patch of road. The display may remain on, while the motor becomes silent. That confusing moment can come from a loose battery connection, overheating, brake-sensor interference, a speed-sensor fault, or a controller problem.

Richard Peace, an experienced e-bike journalist and industry educator, offers a useful reminder: “Check the simple causes before replacing expensive parts.” His advice matches real workshop practice. A battery that shifts by only a few millimeters can interrupt power over a curb. A magnet sitting slightly away from the wheel sensor can also stop assistance. Small details matter.

This 2026 guide explains how to fix an e-bike motor that cuts out without guessing blindly. It follows a careful path, from checking battery contacts and error codes to inspecting wiring, brake levers, and motor temperature. Turn the system off before touching connectors. Do not force damaged plugs. If burning smells, melted insulation, or repeated shutdowns appear, professional inspection is the safer choice.

Some faults are obvious. Others are not.

A clean connector does not always prove a healthy connection. I have seen riders replace batteries when a loose sensor cable caused the real problem. That possibility deserves attention. Reliable troubleshooting means observing when the cutout happens, recording the display code, and testing one cause at a time. This approach saves money and reduces unnecessary parts replacement.
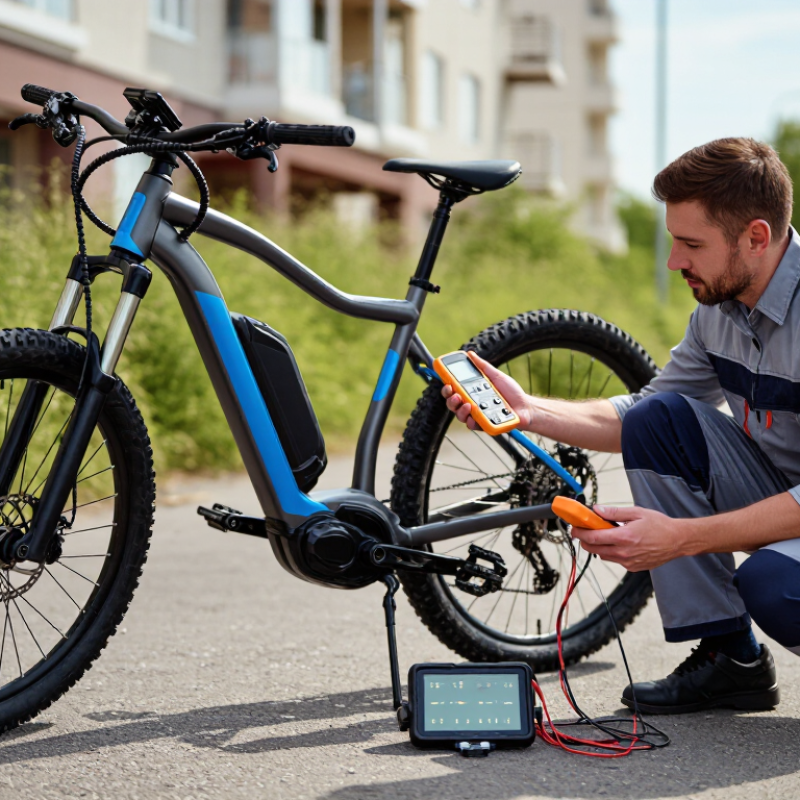
2026 How to Fix an E Bike Motor That Cuts Out?

Identify Why the E-Bike Motor Cuts Out

When an e-bike motor cuts out, identify the trigger before replacing parts. Does it stop on hills, after ten minutes, or when you touch the brake? That timing provides useful evidence. A loose battery contact can interrupt power over bumps. Inspect the terminals for dirt, moisture, or dark burn marks. Check that the battery locks firmly and does not move inside its mount.

The brake cutoff sensors are another common cause. A slightly pulled brake lever may signal the controller to stop assistance. Release each lever slowly and listen for a faint click. Also inspect the motor cable near the wheel, especially where it bends. Damaged insulation, loose plugs, and trapped wires can create intermittent failures. If the display shows an error code, record it before switching the bicycle off. That small detail can prevent guesswork. I once blamed the battery, but a poorly seated connector caused the real problem.

Tips: Test the bicycle on a stand only if the manufacturer allows it. Keep hands away from moving parts. After a short ride, feel the controller area carefully for unusual heat. Stop testing if you notice smoke, swelling, melting plastic, or a sharp electrical smell. Do not open a battery pack yourself. A qualified e-bike technician should test voltage, wiring continuity, and controller signals with suitable equipment. Remember, a motor that cuts out only under heavy load may indicate a weak battery, excessive resistance, or a failing controller. More testing may be needed.

Check the Battery, Connectors, and Power Supply

2026 How to Fix an E-Bike Motor That Cuts Out?

When an e-bike motor cuts out, do not blame the motor immediately. The battery and its connections are common trouble spots. Switch the system off and let the battery cool before inspection. Check the charge indicator, then charge it with the specified charger. A display can show full power while a weak battery collapses under load. That detail matters on hills.

Stop using the battery if it swells, overheats, or smells unusual.

Look closely at the battery contacts, discharge plug, and controller connectors. They should fit firmly, without bent pins, loose housings, dark marks, or green corrosion. Wiggle each connection gently while the system is off. Do not force it. A connector that feels warm after a short ride deserves attention. Moisture inside a plug can interrupt power when the frame vibrates. Dry exposed parts completely, but do not spray cleaner into sealed electronics.

If the fault remains, a qualified technician can measure battery voltage at rest and during acceleration. A sharp voltage drop suggests a weak battery, poor contact, or restricted power supply. Inspect the main fuse and power switch only if the service instructions permit it.
Never puncture or open a battery pack.

I once overlooked a slightly loose connector because it looked clean. The fault returned on the next steep climb. That mistake taught me to test connections under real vibration, not only while parked.

Inspect Brake Sensors, Throttle, and Controller Signals

2026 How to Fix an E Bike Motor That Cuts Out?

When an e-bike motor cuts out, inspect the brake sensors, throttle, and controller signals. Do not blame the battery immediately. Turn off the system and remove the battery before checking connectors. Most brake levers contain a cutoff sensor that stops motor power when pressed. A misaligned magnet or sticky lever can trigger it while riding. Watch the display while gently moving each lever. If the motor returns after releasing one lever, that sensor deserves attention.

The throttle needs a steady signal. Check for cracked insulation, loose pins, or moisture around its connector. With a suitable multimeter, measure the throttle output only when the system is safely supported. Many throttles produce roughly 0.8 to 4.2 volts, but service specifications vary. A sudden voltage drop suggests a damaged wire or throttle. I once replaced a controller too quickly, then found a pin pushed backward inside the throttle plug. That mistake cost time and taught me to inspect terminals closely.

Controller signals can fail under vibration. Trace the wiring from the brake sensors and throttle to the controller. Look for crushed sections near the frame hinge, sharp bends, and green corrosion. If the motor cuts out when handlebars move, suspect a strained cable. Record when the fault happens: during braking, acceleration, rain, or bumps. A technician can then test controller input and output signals without guessing. Do not bypass a brake cutoff sensor for regular riding. That shortcut can remove an important safety function.

Test the Motor, Wiring, and System Error Codes

An e-bike motor that cuts out needs a methodical check. Do not replace the motor immediately. A weak battery, loose connector, or sensor fault can create similar symptoms.

Start with a short ride on a stand, if the bicycle is secure. Apply gentle pedal pressure and listen for clicking, grinding, or sudden silence.

Then inspect the motor cable near the axle. Repeated flexing can damage wires inside the insulation. Disconnect the battery before checking plugs.

Look for bent pins, moisture, dirt, or heat-darkened plastic. A multimeter can help test continuity, but follow the bicycle’s service instructions. Incorrect probing may damage a controller.

Read the system error codes before clearing them. Record the exact code, riding conditions, and battery level.

Some faults appear only when the motor is warm or under load. Check brake cut-off sensors, pedal-assist sensors, and display connections.

If the code returns after a connector inspection, professional diagnosis is safer.

I once blamed a motor, but a loose brake sensor caused the shutdown. My first test was too quick.

Tips:

Wiggle each cable gently while testing, not forcefully. Photograph connector positions before unplugging them. Never bypass a safety sensor.

If the motor cuts out after rain, let every connection dry completely. A code that disappears is still useful evidence.

Recheck it later.

Repair the Fault and Verify Reliable Motor Operation

When an e-bike motor cuts out, do not replace parts blindly. The fault may be simple: a loose battery terminal, damaged cable, or overheated controller. Switch off the power and inspect connectors for bent pins, moisture, or darkened plastic. Secure the battery and check whether the display loses power simultaneously. That detail separates a motor fault from an interrupted power supply. A multimeter can confirm battery voltage, but follow the vehicle’s service instructions carefully. Never probe sealed electronics casually.

If the motor stops only under load, inspect the phase wires and sensor plugs. Look for pinched insulation near the frame hinge or rear axle. Read any stored error code before clearing it. A qualified technician can test sensor signals, controller output, and pedal-assist inputs with proper equipment. I have seen riders blame the motor when a loose connector caused the cutout. I have also trusted a visual inspection too quickly. That mistake matters. Heat damage can hide inside an intact cable sleeve.

After repairing the fault, secure every cable away from moving parts. Confirm that each connector lock is fully engaged. Test the wheel off the ground briefly, then apply light load in a controlled area. Listen for grinding, pulsing, or delayed engagement. Check the motor housing temperature after several minutes, not immediately. Repeat acceleration, braking, and assisted riding several times. A reliable repair should survive vibration and normal temperature changes. If the cutout returns, stop riding and seek qualified service instead of guessing again.

2026 How to Fix an E-Bike Motor That Cuts Out? — Repair the Fault and Verify Reliable Motor Operation
Diagnostic Stage Observable Symptom Recommended Check Likely Fault Corrective Action Verification Method Priority
1. Confirm the fault Motor assistance stops suddenly during pedaling, especially under load. Record when the cut-out occurs: during acceleration, hill climbing, braking, vibration, or after several minutes of riding. Intermittent electrical connection, protection shutdown, or a sensor signal interruption. Do not repeatedly ride the bicycle until the cause is identified. Note the battery charge level, motor temperature, and riding conditions. Repeat a controlled test on a safe, level route and compare the conditions that trigger the interruption. Medium
2. Check battery installation Display remains on, but motor assistance disappears when the bicycle hits a bump or enters a high-load section. Turn the system off, remove the battery, and inspect the mounting rail, locking mechanism, terminals, and visible wiring for looseness or contamination. Battery movement, poor terminal contact, damaged mounting hardware, or oxidation on the contacts. Clean accessible contacts with an approved electrical-contact cleaner, secure the battery mount, and replace damaged hardware. Do not bend terminals or bypass the locking system. With the system powered off, confirm that the battery is firmly locked. Perform a gentle stationary movement check without forcing the connectors. High
3. Inspect external connectors Motor cuts out when the handlebar is turned, the frame flexes, or the cable is touched. Inspect motor, display, brake-sensor, speed-sensor, and battery cables for pulled sections, crushed insulation, loose plugs, water entry, or incorrect alignment marks. Partially engaged connector, damaged cable, moisture, or excessive cable tension at the steering area. Power down before disconnecting anything. Reseat compatible connectors fully, route cables with adequate slack, and replace damaged wiring rather than twisting or taping conductors together. Turn the handlebar from side to side and gently move the cable harness while checking that the display and assistance remain stable. High
4. Check brake cut-off sensors Motor assistance stops even though the rider is not intentionally braking. Check whether either brake lever is partially held, misaligned, or returning slowly. Inspect the brake cut-off sensor and its cable. Brake lever misalignment, sticky lever pivot, or a continuously active brake-inhibit signal. Ensure both levers return completely. Adjust the lever or sensor only according to the bicycle service instructions. Replace a defective sensor if adjustment does not restore normal operation. After confirming the brakes operate safely, test assistance with both levers fully released. Never disable a brake safety function as a permanent repair. High
5. Inspect the wheel-speed sensor Assistance pulses, stops at low speed, or fails after the bicycle starts moving. Check the sensor and magnet alignment, mounting security, cable condition, and distance between the sensor and magnet. Verify that the wheel and magnet rotate without contact. Misaligned or missing magnet, loose sensor, damaged cable, or no wheel-speed signal. Restore the specified alignment and secure the mounting hardware. Replace damaged parts with compatible components. Use the display diagnostic screen, if available, to confirm that speed is detected consistently during a slow test ride. Medium
6. Check for overload or thermal protection Motor assistance stops during a long climb or heavy acceleration and returns after cooling. Check whether the motor housing is unusually hot and whether the interruption occurs only after sustained high load. Controller or motor thermal protection, excessive load, low tire pressure, heavy cargo, or prolonged operation at low speed. Stop safely and allow the drive system to cool. Reduce load, use an easier gear, maintain suitable tire pressure, and avoid prolonged maximum assistance on steep climbs. After cooling, test under moderate load. If cut-outs continue or the motor becomes excessively hot quickly, arrange professional inspection. High
7. Evaluate battery voltage under load System shuts down during acceleration even though the battery indicator shows charge remaining. Check battery age, charging behavior, stored-charge level, and voltage drop under load using the vehicle’s diagnostic procedure or a qualified technician’s test equipment. Weak battery cells, excessive internal resistance, poor terminal contact, or a battery-management-system protection event. Fully charge the battery with the correct charger and inspect the connection. Do not open, puncture, rebuild, or test lithium battery cells without qualified training. A qualified technician should compare resting voltage and loaded voltage and check for fault codes. Replace the battery if it fails the manufacturer’s safety and capacity tests. High
8. Review display and controller codes Motor cuts out together with an error symbol, flashing indicator, or repeated restart. Record the exact code and its timing. Check the service documentation for the corresponding sensor, communication, brake, speed, or controller fault. Controller communication error, sensor fault, firmware-related issue, or detected abnormal electrical condition. Power-cycle only as a diagnostic step. Inspect the related connectors and follow the documented fault procedure; do not repeatedly clear an unresolved safety code. Confirm that the code does not return during a monitored test ride and that all assist levels operate normally. Medium
9. Inspect motor and controller wiring All basic external checks pass, but the motor still cuts out intermittently or will not start. Look for abrasion, water damage, pinched wiring, loose terminals, burnt odor, discoloration, or signs of overheating around the controller and motor cable. Internal wiring fault, controller failure, phase-wire damage, or water-related electrical damage. Stop using the bicycle if there is a burnt smell, melted insulation, smoke, or visible heat damage. Have the controller, motor cable, and motor inspected by a qualified e-bike technician. Technician performs continuity, insulation, sensor, and controller tests using the correct procedures and equipment. High
10. Final reliability test Repair appears successful, but reliability has not yet been confirmed. Check battery security, connector seating, cable routing, brake operation, wheel-speed detection, and error-code status before riding. Unverified repair, recurring intermittent fault, or a second problem hidden by the original symptom. Perform a staged test: low assistance on level ground, gradual acceleration, moderate incline, controlled braking, and a short bump test on a safe route. Motor assistance should start and stop predictably, remain stable under moderate load, and show no warning code, abnormal noise, burning odor, or excessive heat. High
Safety note: Always switch the system off before inspecting connectors or moving parts. Never ride an e-bike with damaged wiring, a loose battery, compromised brakes, smoke, or a burning smell. Lithium-ion battery repairs should be handled by a qualified professional.

FAQS

Why does an e-bike motor cut out during a ride?

Note when it happens: hills, bumps, braking, rain, or after several minutes. Timing reveals possible causes.

How can I inspect the battery connection safely?

Turn off the system and remove the battery. Check terminals for dirt, moisture, dark marks, or looseness. The battery should not move in its mount.

Could a brake lever stop motor assistance?

Yes. A misaligned sensor or sticky lever may signal a cutoff. Release each lever slowly and listen for a faint click.

What should I check around the motor cable?

Inspect bends near the wheel and frame. Look for damaged insulation, loose plugs, crushed sections, or trapped wires.

How do I inspect the throttle?

Check its connector for moisture, cracked insulation, loose pins, or a pushed-back terminal. A steady signal matters. Small parts matter.

What does a motor cutoff during handlebar movement suggest?

A strained or damaged cable may be reacting to movement. Trace the wiring toward the controller and inspect sharp bends or green corrosion.

Should I replace the controller immediately?

No. A loose connector, weak battery, or brake sensor may cause similar symptoms. I once blamed the wrong part, and it wasted time.

What should I do if the display shows an error code?

Record the code before switching off the bicycle. That detail can help a technician test the correct circuit.

When should testing stop?

Stop immediately if you notice smoke, swelling, melting plastic, unusual heat, or a sharp electrical smell. Do not open the battery pack.

When is professional inspection needed?

A technician should test voltage, wiring continuity, and controller signals with suitable equipment. More testing may be needed; guessing is not diagnosis.

Conclusion

When an e-bike motor cuts out, the first step is to identify when and how the interruption occurs. Ask, “Why does my e-bike motor cut out unexpectedly?” Then check the battery charge, mounting position, terminals, connectors, and main power cables for looseness, damage, or corrosion. A weak power supply or poor connection can cause the motor to stop, especially during acceleration or on hills.

Next, inspect the brake sensors, throttle, controller signals, and display for irregular behavior or warning codes. Examine the motor cable, wiring harness, and connectors for pinch points or broken wires, and use system diagnostics when available. After locating the fault, repair or replace the affected component safely, secure every connection, and test the bicycle under controlled conditions. Confirm that the motor starts smoothly, responds consistently, and remains active during braking, acceleration, and moderate load. If the problem continues, professional electrical testing may be necessary.

Madeline

Madeline

Madeline is a dedicated marketing professional with a wealth of expertise in our company's core offerings. With a keen understanding of the industry, she brings a unique perspective to her role, consistently delivering high-quality content that highlights the superior aspects of our products. As......