Replacing hydraulic disc brakes on your MTB can seem daunting. However, it’s a necessary skill for any cyclist. Knowing how to replace hydraulic disc brakes on an MTB can enhance performance and safety. When brakes wear down, they can impact your riding experience.
Understanding the mechanics is crucial. For instance, a misalignment or improper installation can lead to ineffective braking. Take time to read the manufacturer’s instructions. They often provide vital details. Always gather the right tools before starting. Even seasoned riders can forget simple steps that lead to problems.
Consider practicing on an old bike if you're new to this process. Mistakes can offer valuable lessons. If the brakes feel spongy or slow, reflection on your installation skills may be needed. Embrace the challenge, and with patience, you will improve. This guide offers practical tips for a smooth replacement, focusing on reliability and efficiency.
Hydraulic disc brakes are essential for mountain biking. Understanding their components helps ensure proper maintenance and replacement. These systems include a brake lever, hydraulic fluid, and calipers. Proper function relies on fluid pressure to stop the bike effectively. Without adequate hydraulic pressure, safety is compromised.
Tip: Always check for leaks. A small leak can lead to brake failure. Inspect hoses and connections regularly. When replacing brakes, ensure the pistons are clean. Dirty pistons can compromise braking performance. It's vital to have the right tools for removing and installing brake components.
Another important aspect is bleeding the brakes. This process removes air bubbles from the system. Air in the lines can lead to a spongy feel when braking. Use a dedicated bleeding kit for best results. Take your time during this step; rushing can lead to mistakes. Properly bled brakes provide better stopping power and responsiveness.
Replacing hydraulic disc brakes on your mountain bike (MTB) is a task that requires the right tools and equipment. A study by the International Journal of Bicycle Mechanics highlights that improper installations can lead to increased wear and tear on components. To ensure a smooth replacement, gather essential tools like a torque wrench and a bleed kit. These tools allow you to tighten bolts to manufacturer specifications without over-tightening, which can damage the components.
You'll also need a 5mm Allen key for the brake caliper and rotors. Accurate alignment of the caliper is crucial for optimal brake performance. Inadequate alignment can lead to rubbing and reduced braking efficiency. Some mechanics stress using a specific type of hydraulic fluid, as it greatly influences brake response. Make sure to check compatibility and ensure quality to avoid racing against failure.
Having gloves and a clean work area is equally important. Brake fluid can be corrosive to paint and other surfaces. A clean environment prevents contamination, which could compromise the hydraulic system. According to a report by the Bicycle Product Suppliers Association, many cyclists overlook proper maintenance routines. Regular checks can extend the life of your brakes and improve overall safety. Effective brake maintenance leads to better control during rides and enhances your biking experience.
Removing old hydraulic disc brakes from your mountain bike can seem daunting, but it can be managed with some basic tools and steps. Start by ensuring your bike is secure in a bike stand or on a flat surface. You’ll need an Allen wrench set, a torque wrench, and possibly a bleed kit for the new brakes. As you work, lay out your tools for easy access. Remember, organization is key here to avoid scrambling later.
Loosen the bolts that hold the brake caliper in place. Be gentle and mindful not to strip the bolts. After removing the caliper, detach the brake line from the lever. This step can be tricky as hydraulic systems hold some fluid. Be prepared for a little mess. It’s a good idea to keep a rag handy to catch any oil. While removing, check for any wear on the components. Reflecting on the state of your old brakes can offer insights into your riding habits and maintenance routine.
Once everything is off, take a moment to inspect the mounting points. Clean the area with a cloth to ensure nothing impedes the installation of your new brakes. You might notice some rust or grime; take your time to tackle that. Rushing these steps can lead to improper installation, which could affect performance. This process, although tedious, allows you to familiarize yourself with your bike. Embrace these imperfections as part of your learning journey in mountain biking maintenance.
Installing new hydraulic disc brakes on your mountain bike (MTB) can significantly enhance your riding experience. Start by gathering all the necessary tools. You'll need a bleed kit, wrenches, and a torque wrench. Clean your workspace to prevent dirt from entering the brake system. Proper preparation is key to a successful installation.
Remove the old brakes carefully. Take note of how everything is connected. This moment can be a bit tricky, especially when dealing with stubborn bolts or stubborn rotor locks. Patience is essential here. Once you've uninstalled the old system, install the new brake calipers. Make sure they align with the rotor correctly. Aligning can pose some challenges, and a small misalignment can lead to squeaks or decreased performance.
Next, fill the brake lines with fluid. This step can be messy but necessary for functionality. Keep some paper towels handy. After bleeding the brakes, it's crucial to test them thoroughly. Ride at low speeds initially to check for responsiveness and feel. Each bike will respond differently, and testing under different conditions is important. If you feel the brakes are spongy, you may need to bleed them again or check for air bubbles. Trust your instincts. Over time, adjustments might be needed for optimal performance.
When installing a new hydraulic disc brake system, bleeding and tuning are crucial steps. Proper bleeding removes air bubbles, ensuring optimal performance. According to industry reports, improperly bled systems can result in a 30% reduction in braking efficiency. Air in the hydraulic lines creates a spongy feel, affecting rider confidence and safety.
Start by gathering the right tools: a bleed kit, syringes, and fluid appropriate for your brakes. During the bleed process, pay attention to the fluid level in the reservoir. Too much fluid can lead to overflows, which can damage other components. You should also observe any unusual noises or leaks. These can indicate improper installation or worn components, leading to future malfunctions.
Tuning your brakes after bleeding is equally important. Adjusting the caliper alignment ensures even pad wear and maximizes stopping power. A misaligned caliper can lead to premature wear of up to 50%. Regular checks after tuning keep your system in peak condition. A well-maintained brake system not only enhances performance but also improves overall biking experience, providing peace of mind on tough descents.
| Tip Number | Tip | Description |
|---|---|---|
| 1 | Gather Tools | Ensure you have all necessary tools like a torque wrench, bleed kit, and screwdriver before starting. |
| 2 | Remove Old Brakes | Carefully detach the existing hydraulic disc brakes from the bike. |
| 3 | Inspect Components | Check brake hoses and calipers for any damage or wear before installation. |
| 4 | Install New Calipers | Mount the new brake calipers firmly to the frame or fork following manufacturer's guidelines. |
| 5 | Fit the Brake Hoses | Attach the brake hoses, ensuring they are routed properly and secured. |
| 6 | Bleed the Brakes | Use a bleed kit to remove air from the brake lines, ensuring a responsive braking system. |
| 7 | Adjust Brake Pads | Align brake pads correctly to ensure they make even contact with the rotor. |
| 8 | Test the Brakes | Perform a test run to check responsiveness and make sure brakes are functioning properly. |
| 9 | Secure All Components | Double-check that all components are tightened and secure. |
| 10 | Regular Maintenance | Establish a maintenance routine to ensure your brake system remains in top condition. |
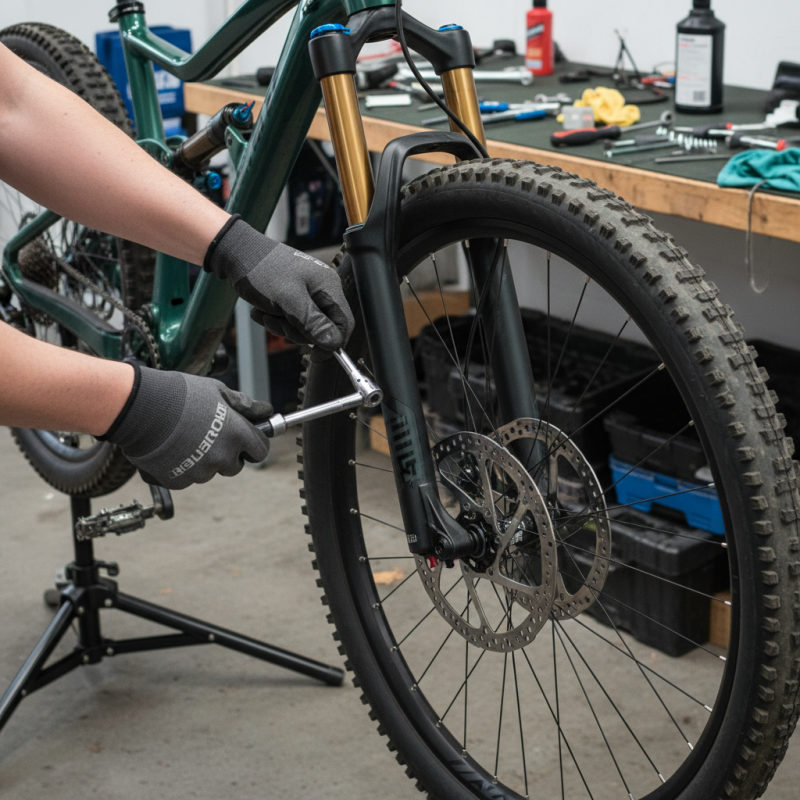
: Essential tools include a torque wrench, bleed kit, and a 5mm Allen key.
Accurate alignment prevents rubbing and ensures optimal braking efficiency.
Keep a clean work area and wear gloves to avoid exposure to brake fluid.
Improperly bled systems can reduce braking efficiency by up to 30%.
Regular maintenance checks help extend the lifespan and ensure safety.
Using incompatible fluid can compromise brake response and lead to failures.
Observe the fluid level, listen for unusual noises, and watch for leaks.
A misaligned caliper can cause up to 50% premature wear on brake pads.
Many ignore regular maintenance routines, risking their safety and performance.
It enhances control and boosts confidence, especially on tough trails.
Replacing hydraulic disc brakes on your mountain bike (MTB) can significantly enhance your riding experience. Understanding the basics of hydraulic disc brakes is crucial, as it helps you grasp how these systems function and the advantages they offer in terms of stopping power and modulation. Before beginning the process, ensure you have all the necessary tools and equipment ready to efficiently replace the brakes.
The step-by-step guide involves first removing the old hydraulic disc brakes, followed by carefully installing the new brake system. This includes properly aligning the brake components and securing them in place. Once installed, it is essential to bleed and tune your new hydraulic disc brake system to eliminate air bubbles and ensure optimal performance. By following these steps, you'll be well-equipped to understand how to replace hydraulic disc brakes on an MTB, ensuring a smoother and safer ride.
Evergreen Vehicle